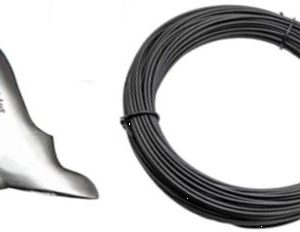
- a high performance plastic welding tool
- Professionally designed
Has a V grooving feature for Hot V the weld joints, - Doubles as a plastic welder tacking tool
- Bullet proof construction
- Made of cast Stainless Steel
Speed Welder Operation instructions
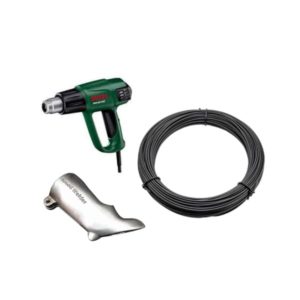
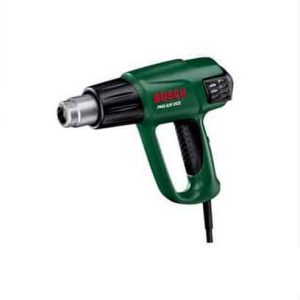
- 1/ Fit nozzle to heat gun a 1500 too 2000 watt heat gun.
- 2/ Set the heat gun to 350 – 400 degrees Celsius
- 3/ Next get the appropriate welding Rod PE or PP etc,
- 4/ Preheat nozzle for 5 minutes,
- 5/ heat work area until glassy appearance, then put Rod into hole of the nozzle
holding a little away from the work till the rod is also glassy now put the two glassy surfaces together
apply pressure and move along slowly, Add multiple runs as needed,
Speed Welding: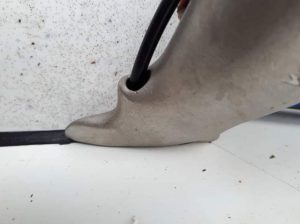
The “Speed Welding” technique should be used for long weld runs.
The term “Speed Welding” gets its name from the fact that it is a relatively fast process and self feeds the rods
Fitting the Speed Welding nozzle
The Speed Welding nozzles are an easy push fit onto the standard heat guns Once up to temperature, simply insert the welding rod into the Speed Welding nozzle and apply a downward pressure on the welding rod itself.
Apply approx. 2.5 – 3 kgs of downward pressure, forcing the welding rod through the speed welding nozzle
and into the weld area. The welding tool will only need to be supported,
as the force on the welding rod will move the tool along the weld area with ease.
The “Speed Welding” process is fast, and very easy to achieve
Plastic Welding & repair is relatively easy to carry out, and providing you follow a few fundamental steps,
strong structural welds can be achieved.
Surface Preparation
As with all forms of welding, cleaning of plastic components prior to welding is as important
as any other welding preparation in achieving strong, structural welds.
Poorly prepared plastic components will lead to weld failures.
Plastics surface preparation involves ensuring all soils are removed. Any paints, oils, greases
and even UV degredation must first be removed prior to welding.
With large parts, eg. Bumper bars, washing the part is usually a good start.
This will ensure we are removing any atmospheric soils, eg. Mud, Traffic films etc .
Use a soft sponge with warm water –
don’t use any industrial detergents as these can also introduce film coatings
that may also effect the welding results.
Any painted surfaces should also be cleaned right back to the parent material.
Paints and other remaining soils should be removed easily using a standard abrasive wheel (sanding disc) with any high speed air drill or electric drill will do the trick. A grinding disc will make quick work of this process, but be warned – plastics yield easily to abrasives, so take care you don’t end up damaging other sections of the part where the wheel can ‘catch’ and ‘drag’ across the component.
This process can create a fair bit of dust, so we recommend the use of a face mask when performing this task. Other methods for preparing plastics include – paint scrapper, sharp blade, clean wire brush…
Once the part has been properly cleaned are prepared, we are now ready for the “Tacking” step.
Applying a “V” groove to the weld area:
Welding of plastics components relies on a number of factors –
Surface Preparation
Good joint interfaces
Plastics Identification / Correct welding rod selection
“V” Grooving, using the rotary burr
Tacking
Correct welding temperatures
Welding technique
A Rotary Burr is used to provide a “V” groove along the weld line. Take care when using the rotary burr,
as plastics will yield easily to abrasives. Ensure you use adequate jigging and support, to prevent the rotary burr from ‘digging in’ and running across the plastic being repaired. When “V”ing is complete, you are now ready
Welding should be carried out in one continuous run along the length of the area to be welded.
Welding speed should be adjusted to the point where you observe a slight ‘wash’ at the sides of the welding rod.
When complete allow the plastic component to cool completely before attempting to trim or clean up the welding area.
This is important as the plastic will not be at full strength until completely cool.
Trimming & sanding can now be carried out if required.
Test Kit
Plastics Identification:
You can only weld “like” materials. For example, Polypropylene (most car bumpers)
can only be welded with a Polypropylene welding rod.
So it is very important to first identify the material to be welded.
Today most plastics used in the manufacture of modern vehicles are stamped with plastics identification codes,
however, where this identification is not present a welding test is required to ID the material to be welded.
You can only weld “like” materials. For example, Polypropylene (most car bumpers)
can only be welded with a Polypropylene welding rod.
So it is very important to first identify the material to be welded.
There are some 20 commonly found plastics and many more made up of two or more mixtures of materials,
known as ‘plastic composite materials’. As only “like” materials can be welded,
identifying the plastic correctly is vital.
Today most plastics used in the manufacture of modern vehicles are stamped with plastics identification codes,
however, where this identification is not present, a welding test is required to ID the material to be welded.
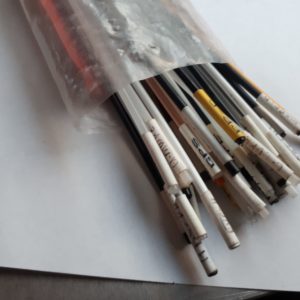
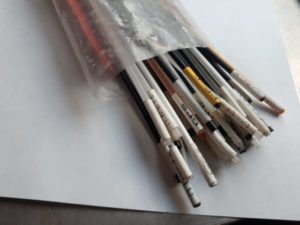
The quickest, safest and easiest way to do this is using a Rod Test Kit
This plastic ID test kit provides the welder with over 40 different materials for ID testing.
It is by far the most easy and safe way to verify your plastic material type.
The rods have been specially selected for weldability
and compatibility with a wide range of commonly found plastics in the Automotive Repair and Fabrication industries. RTK rods are UV stabalised where applicable.
The Test kit contains the following thermoplastic materials:
ABS, ABS Blend, ABS/PA, ABS/PBT, ABS/PC, ASA/PC, ASA/PBT, AES, ASA, HDPE(crate),
HDPE(pipe), HIPS(Polystyrene), HMWPE, LLDPE(PE),
MDPE(Pipe), MDPE(Rotational), PA(Nylon 6), PA66HS, PA/PPE-GTX, PBT, PC, PC/PBT,
PC/PET, PET-G, PMMA(Acrylic), POM(Acetal), PP(Sheet), PP(Crate), PP(Homopolymer),
PP/EPDM, PPE, PPE/PA, PPO(Noryl), PUR, PVC(Flexible), PVC(Rigid),
C-PVC, RANCO(Random PP), TPR and UHMWPE.
Test Kit procedure:
Simply clean an area on the underside of the part to be tested.
Ensure you remove any contamination (grease, oils, paints etc) before attempting his test.
- Select a rod from the Plastic Test kit that appears and feels similar to the parent material.
- Attempt to weld (approx. 30mm) of the selected rod to the parent material,
leaving a tail (30mm long) at 90 deg to the parent. - Once complete, allow to cool. It is important to note that plastics will not hold full strength until completely cold.
- Attempt to remove the rod with a pair of pliers, pulling at 90 deg to the welded part.
If the rod snaps off leaving the material on the parent, you know you have a match. - Repeat the test with another rod selection until you find the correct match
If you’ want to get more info Click Here